
本文由ScriptEcho平台提供技术支持
项目地址:传送门
使用 PlayCanvas 创建带有后处理效果的 3D 场景
应用场景介绍
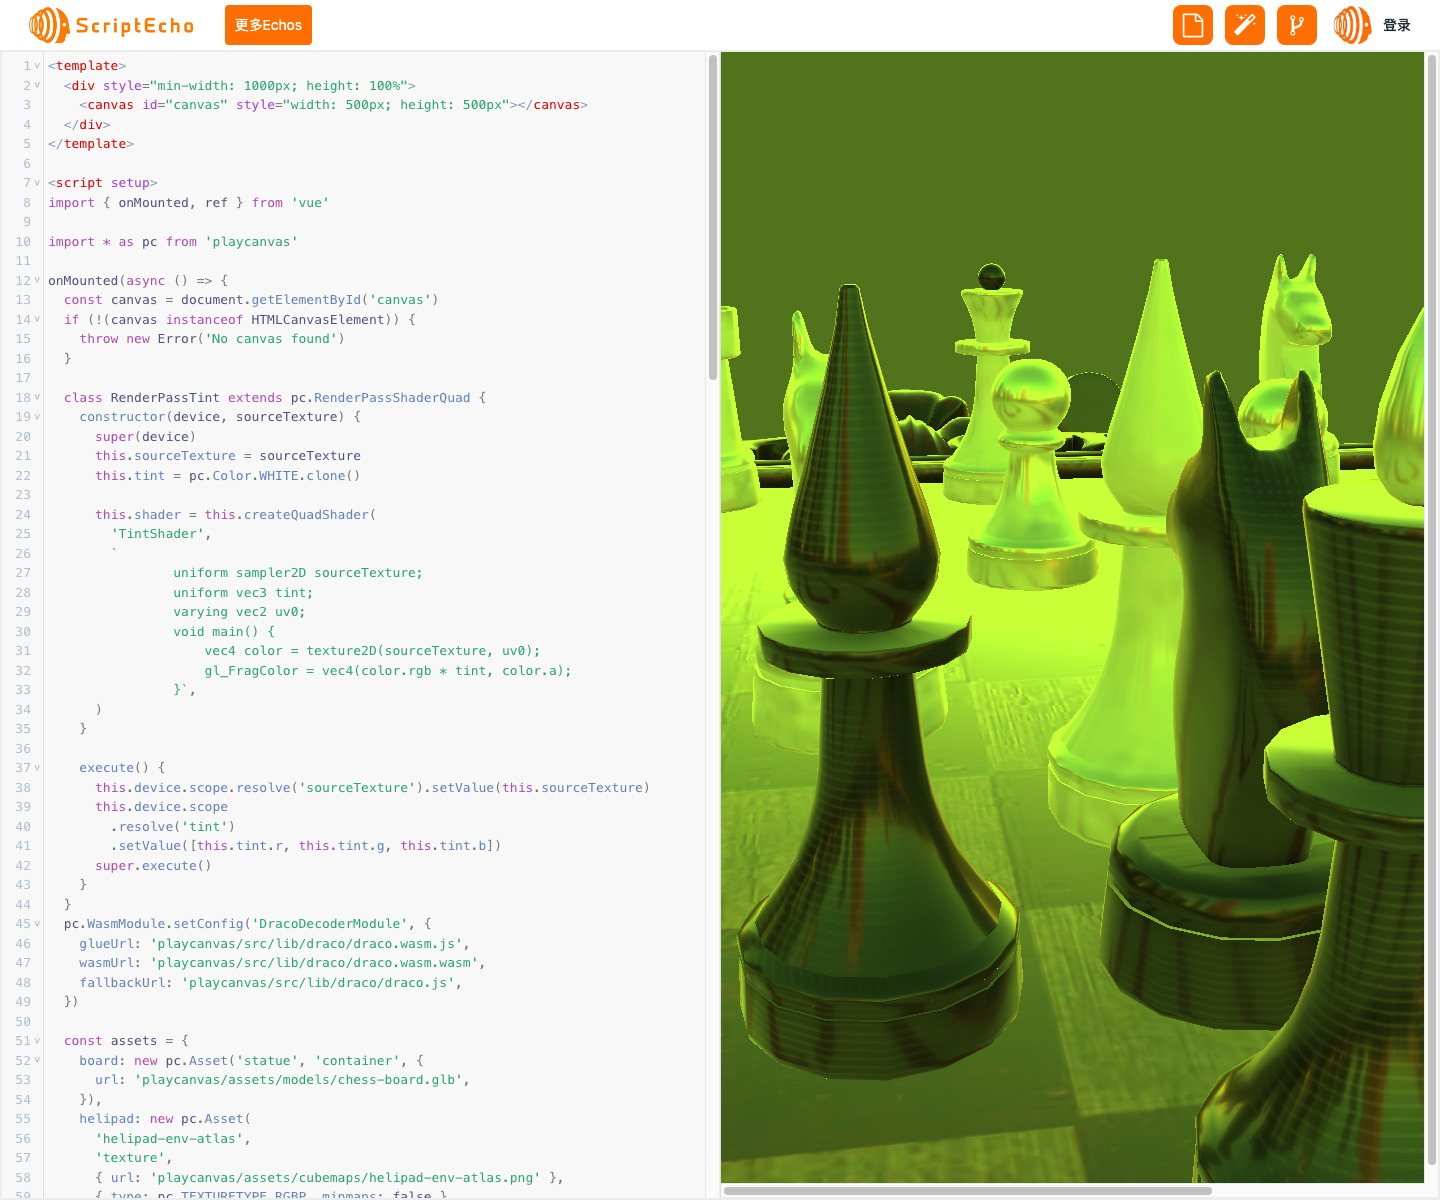
本代码演示了如何使用 PlayCanvas 创建一个带有后处理效果的 3D 场景。用户可以在场景中查看一个棋盘模型,并使用后处理效果为场景添加色彩效果。
代码基本功能介绍
该代码实现了以下基本功能:
- 使用 PlayCanvas 创建一个 3D 场景,包括棋盘模型和相机。
- 创建一个渲染通道,将场景渲染到纹理中。
- 使用自定义着色器创建渲染通道,对纹理应用色彩效果。
- 将两个渲染通道分配给相机,以应用后处理效果。
- 实时更新色彩效果,以创建动态效果。
功能实现步骤及关键代码分析说明
1. 初始化 PlayCanvas
首先,我们使用 PlayCanvas 的 createGraphicsDevice() 函数创建图形设备。然后,我们使用 AppBase 类创建一个应用程序并初始化它。
const device = await pc.createGraphicsDevice(canvas, gfxOptions)
const app = new pc.AppBase(canvas)
app.init(createOptions)
2. 创建场景和相机
接下来,我们创建一个场景并添加一个棋盘模型。我们还创建一个相机实体并将其添加到场景中。
const boardEntity = assets.board.resource.instantiateRenderEntity({
  castShadows: false,
  receiveShadows: false,
})
app.root.addChild(boardEntity)

const cameraEntity = new pc.Entity()
cameraEntity.addComponent('camera', {
  clearColor: new pc.Color(0.4, 0.45, 0.5),
  farClip: 500,
})
cameraEntity.setLocalPosition(0, 30, -60)
cameraEntity.lookAt(0, 0, 100)
app.root.addChild(cameraEntity)
3. 创建渲染通道
我们创建一个渲染通道,将场景渲染到纹理中。
const texture = new pc.Texture(device, {
  name: 'RTTexture',
  width: 4,
  height: 4,
  format: pc.PIXELFORMAT_RGBA8,
  mipmaps: false,
  minFilter: pc.FILTER_LINEAR,
  magFilter: pc.FILTER_LINEAR,
  addressU: pc.ADDRESS_CLAMP_TO_EDGE,
  addressV: pc.ADDRESS_CLAMP_TO_EDGE,
})

const rt = new pc.RenderTarget({
  colorBuffer: texture,
  depth: true,
})

const renderPass = new pc.RenderPassForward(
  app.graphicsDevice,
  app.scene.layers,
  app.scene,
  app.renderer,
)
renderPass.init(rt, {
  resizeSource: null,
})
renderPass.addLayer(cameraEntity.camera, worldLayer, false)
renderPass.addLayer(cameraEntity.camera, uiLayer, true)
4. 创建着色器和渲染通道
我们创建一个自定义着色器,将色彩效果应用于纹理。然后,我们创建一个渲染通道来应用着色器。
class RenderPassTint extends pc.RenderPassShaderQuad {
  constructor(device, sourceTexture) {
    super(device)
    this.sourceTexture = sourceTexture
    this.tint = pc.Color.WHITE.clone()

    this.shader = this.createQuadShader(
      'TintShader',
      `
                uniform sampler2D sourceTexture;
                uniform vec3 tint;
                varying vec2 uv0;
                void main() {
                    vec4 color = texture2D(sourceTexture, uv0);
                    gl_FragColor = vec4(color.rgb * tint, color.a);
                }`,
    )
  }

  execute() {
    this.device.scope.resolve('sourceTexture').setValue(this.sourceTexture)
    this.device.scope
      .resolve('tint')
      .setValue([this.tint.r, this.tint.g, this.tint.b])
    super.execute()
  }
}

const tintPass = new RenderPassTint(app.graphicsDevice, texture)
tintPass.init(null)
5. 将渲染通道分配给相机
我们为相机分配两个渲染通道:一个用于渲染场景,另一个用于应用色彩效果。
cameraEntity.camera.renderPasses = [renderPass, tintPass]
6. 更新效果
我们通过更新色彩效果来创建动态效果。
app.on('update', function (/** @type {number} */ dt) {
  angle += dt
  tintPass.tint.lerp(
    pc.Color.YELLOW,
    pc.Color.CYAN,
    Math.sin(angle * 0.5) * 0.5 + 0.5,
  )
})
总结与展望
通过使用 PlayCanvas,我们能够创建带有后处理效果的动态 3D 场景。这种技术可以用于创建各种视觉效果,例如色彩校正、模糊和发光。
未来,我们计划扩展此代码,添加更多后处理效果,并探索使用 PlayCanvas 的其他功能,例如物理和动画。
更多组件:
获取更多Echos
本文由ScriptEcho平台提供技术支持
项目地址:传送门
扫码加入AI生成前端微信讨论群:

 Login
Login